
|
I downloaded Nahlakh, a role-playing game, sometime in the late 1990s or early 2000s. I sent $10 to the creator for the guidebook. Role-playing, Dungeons and Dragons-style games don't often translate well to computer format. This one does. It's highly repeatable, and you will spend many weeks trying to beat the game.
|
|
Rob Zerwekh's walkthrough
I. Choosing characters
You have eight characters in your group. Make sure you have at least two spellcasters (magic) and two priests (prayer). Magic and prayer are vital the further you go, and your weapon-wielding characters will be less-important. I like to use the other four characters for a swordsman (1h and 2h); a ranger who can use both bow and crossbow, as well as other weapons; a big burly type who can bash you into the ground (mace); and a another swordsman who can also use axes.
Make certain at least one character has hunting skills; one needs lockpick skills; one needs swimming skills; one needs searching skills; one needs trap disarming skills; one needs music; finally, one needs merchant skills so you can sell your bounty.
It's up to you to assign health, strength, dexterity and intelligence points. Just remember: mages and priests lose strength with each spell/prayer, so they need more than you might realize. Intelligence improves chances of casting spells/prayers and resisting them from your enemies. Dexterity improves your movement, and the chances of going first in battle. Don't forget to save often, especially before entering battles.
II. Premise
Your team will travel over three continents, building skills, looting the dead, and doing deeds for frightened towns. Demons are exerting their influence across the land, even in the happy creatures of the forest. Your goal is to collect 13 keys that will allow you access to a jungle ice castle, and eventually, the demon world itself (a fourth continent).
In the demon world, you must kill Nahlakh, the physical representation of all demon energy. The number of demons increases as the days pass, so don't dawdle! When you reach the gate to the demon world, make sure you are covered head to toe in iron and wielding iron or holy weapons. Only iron and holy materials survive intact. However, don't let your mages/priests wear iron until then, because it lessens their abilities to cast spells and prayers.
III. Enemies
This is a basic list of some of the creatures you will need to kill. Most red bleeders can merely be knocked unconscious, or allowed to flee the scene. There are some exceptions. Anyone bleeding green is a demon, and must be fought to the death. Most species will include warriors, priests/savants/mages/wizards, and a leader.
Humans: These include bandits, brigands, swordsmen, archers, priests, mages, sorcerers and cultists. You shouldn't have many problems with them.
Humanoids: Kobolds, Goblins, Hobgoblins, Orcs, Ogres, Trolls, Gnolls, Dwergers (electric buggers who multiply), Giants, Cyclops, Minotaurs.
Animals: Anything from bunny rabbits to lions to gigantic scorpions to humanized animals that wield weapons.
Golems: These are large magical creations that you generally must hurl rocks at in order to hack them apart.
Dragons: They're tough to beat, but they accumulate a lot of treasure for you to plunder.
Mutants: Genetic experiments gone wrong.
Undead: Skeletons, vampires, liches and such. They must be fought to the death. Silver weapons do twice the damage. Non-silver weapons to half to one-sixth the damage.
Demons: Again, they must be fought to the death. Iron weapons do twice the damage.
IV. Types of items
This is a list of some of the adjectives you will see modifying weapons and armor. Most adjectives, like poisonous, icy, accurate, broken, rusty, etc., you should figure out on your own.
Iron: Twice the damage against demons, improved magic resistance (but also lessening your own ability to cast spells/prayers), 150% weight.
Silver: Twice the damage against undead. 150% weight.
Holy: Triple the damage to both demons and undead, +5 armor.
Faerie: Teleporting, +2 to armor, 50% weight
Vampiric: Adds half the damage to the user's HT.
Elven: +3 damage, +1 armor, 50% weight.
Dwarven: +4 damage, +3 armor, 200% weight.
Antimagic: Improves resistance against fire/cold/shock/death bolts.
Lockpicks: You will need these to open locked doors and chests.
Rope: This will come in handy later.
V. Let's begin!
Your party starts on the Nedly Isle. There are kobolds in the immediate area. Make sure you are armed with whatever weapons you might have, and engage them. Once they're dead, loot them, head immediately north to the town of Nedly. Sell whatever you don't need. Make sure the character with the highest merchant rating at the start handles all transactions, in order to get the best price. Talk to the mayor. The mayor will offer you a reward if you kill the Kobold Chief. You don't have to start there, though. Nedly contains an underground crypt, and you can pick up some better weapons and merchantly items if you descend below.
Nedly's crypt is hidden. Go to the area just below the boat dock. On the left, across from the cauldron, is a shop where the harbormaster hangs out. Search the southwest corner of the store for the secret passage to the ladder. Once down, go south, then west to meet up with the thieves and bandits living here. Stay away from the actual crypt section for the moment. The good stuff is in the southwest portion of the thieves' guild. A weapon room contains an obsidian sword. You might also find a silver weapon in the guildmaster's office. That office also contains a secret door in the southwest corner to some treasure chests. Once you have a silver weapon, you can enter the crypts. You'll find skeletons. Some of the coffins contain coins. Don't forget to use your priests to "turn undead," which does damage to all undead creatures in the battle area. Collect what you can and cash in upstairs. If you find the battles too tough for now, you can go to the Kobold Tunnel and build up your skills, then return to the Nedly crypt afterward.
The Kobold Chief lives in the kobold tunnel in the mountains to the south of town. The entrance is a little west of due south. This is a long and complex tunnel with mostly kobolds and rats. Stay north of the tunnel's river for now. Reaching the chief in the northeast section requires manuevering around a rock collapse. Keep going NE from there. The chief has a hidden treasure room on the north wall, and a temple, whose entrance is just to the right of the original entrance. Kill the chief, return to town and collect your reward.
Return to the tunnel. Find the river. There is a shallow crossing you can use. A couple of liches have temples off the south bank. There is a spider room too. A skeletal knight's tomb is off the north bank, just southwest of the shallow crossing. You can pick up some better weapons, armor and items to sell if you kill them. Once done, head northeast where the river ends, then southeast (killing bats and goblins along the way) to the other end of the tunnel.
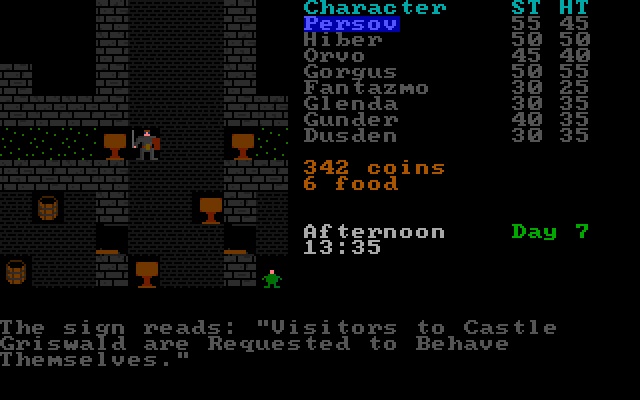
Now you're in the main part of the Nedly Isle. The next town is Castle Griswald, southeast of the tunnel entrance. Their mayor will ask you to kill the goblin chieftain, to the north. Starting with this town, you will encounter trainers who can improve your health/strength/intelligence/dexterity for a fee. Take advantage when you can, but watch your wallet. The prices rise accordingly as you gain points. Start looking for a length of rope at the stores as well. You'll need it later. The goblins won't present a problem. After handling them, head west from Griswald, south, then curl north around a mountain range to reach Aranthak's tomb.
Aranthak's Tomb: Aranthak is a lich, and a keyholder. His tomb contains undead and golems. Head north at the first junction, then east to the end of the hall, then south. You will avoid some annoying teleporting passageways. After heading south, take the first right and summon your patience (and a rock wall) to hack apart two sets of golems. Aranthak is in the back of the large room. He has a hidden treasure room behind his throne. Return to the quad junction and head south to the second junction. You will be teleported closer to the crypt. Go west, turn south, then east, and kill any undead along the way. You will reach a tomb for more treasure. Return from the crypt and go north until you are able to turn left out of Aranthak's tomb.
Return to town to cash the treasure. Remember to keep good weapons and armor; trade up along the way, but watch your weight burden. The more you carry, the slower you move. The lizard king and his key are northeast from town. He's the last keyholder on the island, but you should kill everyone you meet to improve your skills, cash treasure, and upgrade your supplies. The frogmen (they jump all over the place) lie in the swamp just to the south/southeast of town. Go far southeast, then north around the river to find the elven town of Glade. Their mayor has a task for you too. The Hobgoblin chief is southeast of the elven town. The Orc chief resides to the north/northwest. The Ogre king is far to the north. Explore the caves fully, kill everyone you meet, and collect as much loot as you can, and upgrade your weapons and armor.
Once you've killed all of those fellows, head south from the Glade, then west along the southern part of the island. Scurrio, with a boat dock, lies in the southwest portion of the island. The trolls, who frustrate because they regenerate, live in an underground cave to the east of Scurrio. They have nice piles of coins, though. Kill their king, and reap the reward from the nearby mayor. This boat goes to Avard Isle - but don't go there yet. You will need to return to the original town of Nedly to catch the ferry to Vedbaek Isle.
Vedbaek Isle
If you arrive from Nedly, you'll dock at the city on the Eastern peninsula of the continent. There are three other cities; one in the far southeast; one is in the north (follow the road); and the last one is an oasis in the southwestern part of the desert. Your first task (for cash) requires you to travel north, off the east side of the road, to Mivakios' abode. He runs a tight army of demon cultists.
Demon cultists: These guys carry poisonous weapons, so handle with care. The room on the southwest corner has a hidden door on the west wall. To reach Mivakios, start at the entry room. Go east, north and east. The temple door is on the south side of the hall. There are two sets of priests with which to deal. There is a door on the south wall which leads to both a dungeon and Mivakios' room. He is not difficult. Mivakios' room leads to a secret room on the west wall, which in turn leads to two more secret rooms to the north and south. You'll see those secret rooms are actually tucked between the temple and Mivakios' room. The dungeon, accessible by ladder, isn't very big.
At the town at the end of the road, you will find the dock to Avard. You don't need to go yet, of course. You will also find a dexterity trainer. Train! It is vital for you to start going first in battles ahead. The mayor here asks you to kill Krelmak, the leader of the bandits. Head southwest from town into the desert plain, then southeast along the mountains to the bandit cave.
Bandit cave: A long entrance takes you southeast. At the end of the first hall lies the temple. You'll find a couple of storage rooms with some goodies on either side of the hall too. To reach Krelmak, go south from the quad junction. You're heading toward a teleporting scorpion maze, so get ready with those rock walls, because giant scorpions are dangerous! Go east at the first sign of a hall. You'll eventually turn southeast and south toward a pile of scorpions. After killing them, go west, but don't enter the middle of the intersection, or you will teleport! Slip through by moving diagonally, southwest, instead of south and west into the hall. Go south, east, south, then east. Open two doors. Krelmak waits behind door #2. This is where it is important to go first, because Krelmak, and the liches and demons who accompany him, are high-powered prayer and spellcasters. It took me several tries to kill them all. I attacked the liches, then Krelmak, then the demons. There is a hidden door on the east wall. Return to town to collect your reward.
Return to the path that heads southeast. There's a point where you will want to leave path to head due south, with the mountains on the west and water on the east. That will lead you to the birdmen.
Birdmen fortress: Birdmen are hard to hit because of their dexterity. The birdmen live in a guano-caked fortress in the mountain range. You will also encounter shrikes (which have quickness - many moves per turn) and large rocs which can kill with one hit. Several rooms contain items and coins, so explore them all. Two rooms in the south have perfume and cinnamon. To reach the chief from your starting point, go east, then slightly north in the clearing. Go east again, then turn south. Fight your way through the temple, which contains multiple sets of mages and elders. The hidden door is on the east wall. This leads to a slender room. The chief's door on the opposite wall is slightly above the secret door you just used. Killing the chief is a job for your magical and priestly counterparts. The hidden door to the treasure room is in the southeast portion of the room.
The next town lies almost due south, way at the end of a little peninsula. The mayor there will ask you to kill the gnoll chief for a big reward. It's very likely you already encountered the gnoll cave, since it lies to the north of town. The temple is in the southeast corner of the cave. There is a hidden room on the east wall. The chief sits behind a hidden door on the temple's north wall (and a treasure room one more room to the north); another hidden room is on the south wall, with another hidden room to the east of it. You shouldn't have much difficulty. You now have four of the five keys from this island.
From the gnoll cave, go west into the desert. You will probably encounter some annoying sandlings along the way. You want to reach the fourth town on this island - an oasis. Midnight at the oasis, and the local leader wants you to slay the fire giant king. The giants live to the north, and slightly west, in the second mountain cluster. Despite what the book says, the giants don't have a key. But, they do carry plenty of treasure. Giants might be huge, but they are clumsy and unintelligent. The fire giant king lives in the northwest corner of the cave. Choose your treasure wisely, because there aren't many places to cash it in at the oasis. There is also a group of cyclops and their king farther north from the giants. Electric Dwergers and their king live to the northeast of the oasis, but they don't have a key either.
Tomb: After slaying the giants, cyclops, and whatever else you find, you'll begin the search for Lord Dralkha's tomb and his awesome holy sword. Did you buy a piece of rope somewhere? This is where you will need it.
The tomb lies far northwest from the oasis, in the center of a triple mountain peak. You will probably need a couple of days to walk there. Once you find the three single peaks, walk into the center and follow the instructions for rope-lowering. You are now in the tomb, where you will encounter many undead forms. From the entrance, go south, then east. After slaying everything in the large chamber, search for the hidden door on the south wall. Guess what? More undead! Go south as far as you can to reach the first treasure chamber, which is guarded by more undead. There is a hidden door on the south wall. Grab the good stuff and head back north. Halfway up the hall, search for a hidden door on the right side. That will take you east to Dralkha's chamber, where he is also undead, and insane. Once you finish him and his minions, search on the south wall for another hidden treasure room. The holy sword lies in a castle offshore, so you have more work to do.
Scorpion cave: Reaching the castle requires a trip through the scorpion cave. From the oasis town, travel west, then southwest. Make sure your warriors have some magic items, otherwise, they will sit on the sidelines as you always keep rock walls between you, giant scoprions and hyper scorpions. My favorite trick -- use sheets of ice to let the scorpions slip, using them to sting each other. From the entrance, go south to the next chamber. Then go south again. Keep taking the southerly path until you a reach a chamber where you can't go south anymore. Head west, then southwest/west, then south. You should reach a southeasterly path that leads to the Scorpion King. After killing him, retrace your steps to cash his treasure at the oasis, then return to the cave, going southwest as often as you can. The exit is on the far southwest edge.
Island castle: Prepare for frustration, because Lord Dralkha's insanity led him to create a castle with regenerating mutants, passageways to nowhere, and a talking cactus that is supposedly sleeping. Once inside the castle, examine your options. A northeasterly path from the main room takes you through a winding maze with some goods to be gained. It is worthwhile to explore. The northwesterly path will take you, eventually, to an indoor pool containing sharks and octopi. Reaching the dry spots before the sharks reach you will take a few tries to perfect. Beyond the pool lies the entrance to the basement. In the basement, go south and look for the hidden door on the south wall of the junction. Go all the way south to kill more undead. Halfway in between on the left side is a hidden door. Use that to go west and kill more undead. In the chamber, look for the hidden door on the south wall. You will follow a passageway southeast and teleport to a non-connected passage. From there, go north. At the first turn, search for a hidden door on the northeast corner. Go northeast and you will teleport again to a chamber containing the +7 holy sword. Teleport out of the basement by walking into the east wall. Return through the scorpion cave to the mainland and go all the way back to the town at the far northern edge for the voyage to Avard.
Avard Isle
There are only two cities -- Avard in the south and Dossen in the north. When you dock in the south, the mayor will ask you to slay the Slithe King for a big reward. The slithes live to the west/northwest in the swamp. They mean business. These are upright archer snakes that can kill you with one arrow. Their thick bodies make it hard to knock them down. The Slithe King's underground tunnel system in the swamp shouldn't take too long to navigate. Use your tree prayers, or rocks if there are no archers, and keep those spellcasters/priests busy. Your front line will pretty much sit on the sidelines. Take the key and the treasure. Return to town; take advantage of the strength and dexterity training.
From there, head north, killing whatever you meet along the way. Between mountain ranges, start heading west. Dossen is southwest from the northernmost point of the left mountain range. There is a legion of crocas and their king further southwest, but they hold no key, and no treasure, so it's not necessary to deal with them.
Dossen has an enchanter of items, health and intelligence training, oh, and the mayor disappeared some time ago (the town hasn't elected a new one yet). Hmmm! People around town will tell you about crazy shit in the city sewer. You'll see how right they are. You'll find the sewer's secret entrance in the back room of the jewelry store.
Dossen sewer: The bloody tracks lead to your ultimate goal. No matter what you've heard about American sewers, this sewer system tops it all. Your primary enemies are mounds of sludge and piles of goo. Crazy shit. Both take a long time to kill. You'll discover quickly the goo like to fling fatal shit projectiles. Trees will stop it. Small treasures are in the southern rooms. The big bounty is in the northwest corner, where the bloody remnants of the town mayor lie next to a barrel of 25,000 coins. The northeast and southeast corners contain a crypt and dungeon, respectively, with undead enemies and more treasure/items for you.
The townspeople won't elect you mayor after you ascend from the sewer covered in sludge. But, your last four keyholders are all in the same general area, east/northeast of Dossen, along the other mountain range. The troglodytes, spidermen and insectmen all have caves on the south and west side of the range. Drauglak and the dragons are on the north and east side of the range.
Insectmen: Yes, they can knock you down with one blow. Use a rock wall and let the mages and priests go to work. Insect priests don't cast prayers for some reason. The insect tunnel is on the south side of the east-west range, and it can get confusing. You'll need to go east, then south, then east to find the passage to the Queen's chamber. The Queen will cast a mass regeneration spell right away. Bitch! No worries, though. Throw up a rock wall and hit her right away with spells and prayers. Once the Queen is dead, go to work on the others. Return to Dossen to cash in your treasure and build up more health.
Troglodytes: Angry, grumpy apes live farthest south along the west side of the north-south mountain range. You'll probably encounter the spider cave entrance first (if you just finished the insects), but leave it for later. Again, you'll need to use a rock wall to keep these fellows away from your front line. One punch can splatter. Their shamans aren't accomplished. Watch out for sneaky trogs with bows. The trog cave isn't that extensive, so you won't have problems finding and slaying their elder. You'll also find more treasure in a southeasterly room in the cave, guarded by dinosaurs. Cash the treasure at Dossen.
Spidermen: In between the insect and trog caves is the spider hole. Inside, head generally northeast; you'll soon encounter a quad junction. Spider savants live to the north. More savants live to the west, where they construct those annoying hyperspiders. Beware, there are two sets of enemies in that room. East from the quad junction is the Queen's chamber. She hangs with savants and a bunch of sokkas. Sokkas are spellcasting demon spiders. Throw up a rock wall. Brighten magic a few times to make the sokkas irrelevant. Lay down some ice so they run into each other. If the queen isn't stationed around the corner, focus on her. She will drop hailstorms and firestorms on you if you don't take care of business. This might take a couple of tries. Again, cash the treasure once done.
Drauglak's cave: Drauglak should be the final keyholder you face; he is the most difficult. Explore every part of the cave, because you will find piles of gold coins and other treasure stored by the dragons. You'll probably need to make multiple trips back to Dossen to sell the items (and improve your points) before reaching Drauglak. From Dossen, head northeast toward the insect cave, but veer north, curling around the mountain rage, then go east.
This cave contains hatchlings, baby dragons, dragons, old dragons and ancient dragons, as well as fire elementals, fire salamanders and phoenix. Ancients and fire elementals are immune to draining spells and death bolts. They must be fought to the death.
Drauglak himself is in the far south of the cave, off to the left. He is surrounded by many ancient and old dragons. If you have enough dexterity, plus the quickness and haste spells casted for all mages/priests, you should go first. This will be a long battle that requires patience. Pass any healing items to your warriors before engaging. Try to take out the front dragons first, so you can delay erecting trees (which block your boulders and death bolts). Hope that Drauglak is satisfied with breathing fire, because he otherwise likes to become invisible; furthermore he'll drop hailstorms and firestorms on you. With the front line down, go for the ancient dragons, because they have the better magic and prayer skills. Every few turns, use your mages to drain strength from the old dragons to rebuild your own supply. Don't let the dragons darken the magic scale in their direction. With all the ancients gone (and hopefully a few old ones have fled the battle), you can focus on Drauglak. It will take around three turns (6-8 moves per person on quickness) if all four back-liners throw boulders and severe wound prayers at him. Once he's dead, finish up the old dragons and collect the mother lode! Alternately, you can put up a few trees, while leaving an opening for your mages to throw boulders at ancient dragons first, ignoring the old dragons until the end. Just make sure the mages stay far enough away from the dragons breathing fire.
Ice castle: The ice castle is on the east side of the mountain range. It's a long trek from either city. Ice dragons guard the entrance. Let the mages/priests handle it, and you won't have any problems. You need all 13 keys to enter. Immediately inside you'll encounter more ice dragons, with izaakhs (icy demons). Your front line can handle the izaakhs, and the back line can cast spells and prayers against the dragons. Pay attention to the writing on the wall when you see it. In the foyer, head left to find ice trolls, snow leopards, polar bears, frost giants and winter wolves (which breathe icy jets). To the right - caribou, yetis (with shamans), and ice lizards. Head south again for more winter wolf fun. To the right - ice golems. To the left - frost giants. Further south, you'll see signs on each side that say "eternal death ahead," or something like that.
Archliches and skeletal dragons. This marks the final room in the natural world. You start with three archliches and 13 skeletal dragons. I didn't have enough money to buy the proper dexterity for any spellcaster/priest to go first. The archliches don't waste time. They have quickness, and they throw death bolts and hailstorms right away. Eliminate them first! Skeletal dragons like hailstorms too. Mages should throw boulders and priests should banish the dragons. It will take a long time to kill each dragon (takes at least 20 boulders to kill one) and you will spend many sessions trying to win this battle. Once you emerge victorious, you should cash whatever treasure you can carry, scour the towns for iron items, and build up your points. When you think you're ready to enter the demon world, be prepared for a lot of frustration.
Demon world: Iron and holy items survive, as well as a few random items. Adjectives change. Your points are warped. You lose hit points as you walk. It will be annoying. From the starting point, you will walk southwest, and eventually turn south between what look like rivers of fire. Around the end of the river on your left, you will turn west, walking west almost as far you can go. Then you will turn north, and wrap back around to the east. You will reach a castle containing demons and Nahlakh himself. It's not a big castle. But the enemies are long-lasting and it will require many tries to get it right.